AERECO-Demand Controlled Mechanical Extract Ventilation
There is document - AERECO-Demand Controlled Mechanical Extract Ventilation available here for reading and downloading. Use the download button below or simple online reader.
The file extension - PDF and ranks to the Documents category.

341
views
Tags
Related
Comments
Log in to leave a message!
Description
Download AERECO-Demand Controlled Mechanical Extract Ventilation
Transcripts
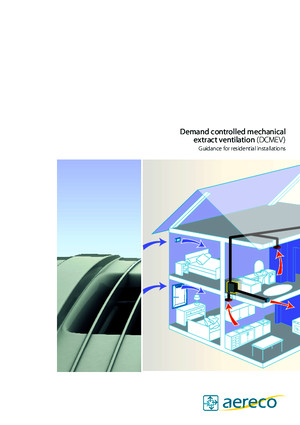
Demand controlled mechanical extract ventilation (DCMEV) Guidance for residential installations 3 4 5 6 7 8 10 11 Introduction Extract and inlet terminals Positioning of inlets / grille terminals for air transfer Fan selection Fan installation Ducting installation System verification and instruction Installation schematic Contents 3 This guide is intended to briefly outline the principles underly- ing the installation of Aereco systems All components of the system should be fitted in accordance with manufacturer’s specifications and the system design schematic Aereco offers ventilation adapted to the needs and demands of the occupants, while ensuring that Indoor Air Quality (IAQ) is not compromised Demand Controlled Ventilation adapts airflow directly at the source of the pollutant, ensuring that the dwelling is neither over-ventilated nor under-ventilated Control is achieved through use of new generation tech- nologies detecting key pollutants known to affect IAQ, such as humidity, CO 2 , VOC (Volatile Organic Compounds); which can lead to a build up of condensation, the formation of mould, and some respiratory conditions Good ductwork installation is the key to an effective venti- lation system Sub-standard installation leads to increased energy consumption and poor indoor air quality Systems should be installed in accordance with manu- facturer’s instructions, as shown on M&E drawings These drawings are typically for guidance purposes, and rely on the competence of the contractor undertaking the works This guide will provide a practical approach to such installations, and will make reference to obligatory standards / regulations Ductwork for Aereco DCMEV (Demand Controlled Me- chanical Extract Ventilation) should be installed to the following standards; HVCA Standard DW/154 for Plastic Ductwork HVCA Standard DW/144 for Sheet Metal Ductwork The component sizes for individual dwelling systems are 204x60mm and 125mmØ, using plastic duct For collective dwelling / communal installations, sizes range from 100mm-630mmØ using metal spiral duct, connecting to the VEC range fan units (not covered in this document) Introduction 4 Extract and inlet terminals Product selection Aereco has a range extract terminals (see BXC Brochure FLY447GB), offering a flexibility of control using innovative integral sensory equipment Aereco appreciates that humidity is a main indicator of IAQ within dwellings, and invented the Hygro control sensor for this purpose The Hygro exploits the expansion and contraction of nylon when exposed to moisture Harnessing this property has enabled energy-free control of the aperture size of grille terminals, which results in a change to the rate of ventilation when combined with a constant pressure / variable volume fan unit Further controlled adjustment to ventilation, by alternative means, can be offered with or without the Hygro sensor For example, smart adjustments can be made with the option of a pyroelectric (PIR) sensor detecting movement (which only adjusts airflow when presence is continually detected) The sensor can also be adjusted to prevent wasteful over-ventilation, such as being activated by a door opening or closing within the detection zone Advancement in control technology from Aereco has also lead to the world’s first integrated CO 2 and VOC sensors within grille terminals Both incorporate six levels of activation threshold, to ensure the rate of extraction is suited to its environment The activation threshold can also be re-adjusted at any time, (should the environmental conditions change) The level of pollutant concentration detected, is shown using an LED display, with green representing levels of pollutant below the threshold, and yellow representing levels of pollutant above the threshold When the pollutant concentration level rises above the level set, the terminal will open the louvres to allow maximum permissible airflow, and will continue extracting at this level for twenty minutes beyond redetection of concentration below the limit Some circumstances may require a nominal amount of manual control, and Aereco has the response to this In areas where additional ventilation over the typical detection range is required, certain models can be supplied with an impulse switch function Terminals are connected to bell button switches, giving occupants the ability to increase ventilation when required, which can be particularly useful in kitchens Aereco also offers a remote version for increasing the ventilation level to peak airflow The terminal incorporates an infrared sensor, activated using a suitable remote control Providing a suitable method of controlled extraction is only part of an effective ventilation system Aereco also offers the Hygro technology in the form of air inlets, to suit both window and wall installation Background ventilation is a necessary feature of a ventilation system that is often overlooked in terms of its function, when combined with a mechanical extract system Conventional air inlets offer little control over the level of air input However with Aereco’s Hygro control, the level of air input is adapted to the occupant’s requirements on a room by room basis 5 The purpose of correctly positioning Inlets and Extract units is to establish and maintain a sufficient rate of air transfer within the building envelope, and thus ensure good indoor air quality To achieve this, air inlets and grilles should be positioned at points away from the door at a typical height of 17m (to avoid unpleasant draughts) Internal doors should also be undercut by 10mm (where thick carpets and floor finishing’s are fitted this clearance should be 10mm above the finished level), in order to ensure good airflow between rooms The undercut will provide a minimum of 7,600mm2 on a standard width door Extract terminals should be installed into, or as close to, the ceiling as possible to ensure that warm, moist air is extracted This should also be positioned away from internal doors, and not placed directly above a cooker (unless also fitted with a FBE filter) to prevent damage to the unit from condensing fats / oils In kitchens where a cooker hood is also fitted, this should be of a kind that filters and circulates the air rather than extracting This is because the rate of extraction would be too great to prevent unnecessary heat-loss Extract units using a PIR / CO 2 / VOC sensor should be fitted with the sensor pointing towards the main area of activity For example facing the door in a WC, or facing the cooker / sink in a kitchen Installation of air inlets should follow the manufacturer’s instructions Aereco will provide further information regarding the slot size for window inlets, and wall passage dimensions with the installation instructions for each specific product It is generally advised that on-site inspections are carried out to ensure that the proposed location is suitable, and to determine that there are no blockages to the path of the airflow It is also required that inlets are sealed in a suitable manner to their support Position of inlets / grille terminals for air transfer Product selection Type of product Product choice Quiet environment Noisy environment Windows Rolling shutters Wall Windows Rolling shutters Wall EMM, EHA², EFR EHT EHA² + Acoustic accessories EHT+Acoustic accessories EMM, EHA², EFR EHT EHA² + Acoustic accessories EHT+Acoustic accessories BXC hi BXC h BXC hrc BXC rc BXC h BXC i BXC pd BXC p BXC hp BXC hpd BXC hi Air inlet Air inlet Extract unit Extract unit Extract unit Extract unit 6 Fan selection Product selection There are several factors influencing the selection of a fan for a particular system Among these factors are; the number of wet-rooms to be extracted from, whether the system is to be fitted to an individual dwelling or collectively extract from a number of dwellings, and sufficient fan power to provide the required number of air changes Aereco has a number of constant pressure / variable volume fan motors to suit a range particular applications and scenarios Although a system would normally be specified and planned by a designer, this section aims to provide guidance on fan selection where a designer has not been involved The location of the system fan(s) can be determined by the type, size and layout of the property concerned Each dwelling type should be assessed individually Typical locations for fan installation include cupboard spaces, loft areas, or ceiling voids Where fans are installed within confined spaces it must be ensured that there is clear space around the fan for the final connection of ductwork onto spigots, and for servicing at intervals specified by the maintenance schedule for the particular unit Once a fan location has been identified, the selection can be narrowed down based on the unit’s sound pressure levels When a fan is located in an area where material construction has poor attenuation properties, one of Aereco’s range of silent units should be installed There are several Aereco fans from which the specifier / installer can choose, offering a variety of airflow characteristics and other properties It should also be ensured that the choice of unit conforms to current building regulations (Building Regulation for England and Wales: Approved Document F, Part K Ventilation of Buildings Scotland, Northern Ireland Technical Booklet K) Aereco can provide guidance for initial selection from 2-6 wet rooms, although the exact ventilation provisions should also be calculated Building type Fan units Product choice Available space in the attic or on terrace Available place in the inhabitable space House VPH2 (protected place) VAM V2A V4A Apartments 1 collective fan for several dwellings or 1 whole house fan per dwelling VEC 240H VEC 271H VEC 321H VEC 382H VAM V2A V4A (1 per dwelling) Offices and meeting rooms 1 collective fan for several desks or 1 whole house fan for several TDA VEC 240H VEC 271H VEC 321H VEC 382H VAM Collective fan Wholehouse fan Collective fan 7 L N 230 VAC INPUT 12 VAC OUTPUTProduct selection Fan installation Aereco’s range of DCMEV fans are simple to install However care should still be taken to ensure that the construction material the fan is fixed onto is able to support its weight Depending on fan type, the unit is to be attached to its support using the recommended / supplied fixing brackets Aereco details this within the Operation and Maintenance manual for each fan Certain models are also capable of being suspended by a cord from the roofing supports In some cases it may be necessary to install the fan(s) onto acoustic / anti-vibration mats to reduce noise transmission In order to carry out servicing, there must be reasonable access to the unit Within loft areas and cupboards this should be achievable without any alterations However when a unit is fitted within a ceiling void it would be appropriate to install an access hatch directly beneath the machine’s location, with a surface area large enough for the removal of the casing’s front cover With certain fan(s) this hatch may need to be larger than the front surface, due to the way the cover is removed Aereco’s residential ranges of DCMEV units are suitable for connection to 230 V 50 hz power supply, via a correctly rated fused spur Power Connection The installer / electrician should first check the electrical rating label to determine whether an earth connection is required A means of isolating the unit for maintenance purposes must be provided and it is good practice to locate this near to the fan, or in an obvious location Care must also be taken when choosing a location, to prevent the machine being unintentionally isolated during normal running conditions Grille terminals with electrical boost may also require a power connection The PIR and impulse switch boost, can either be powered via a hardwired supply, or 2x AAA (15 V) batteries CO 2 and VOC type terminals are hardwired only When hardwired, a rectifier is always required This is already included with the CO 2 / VOC / RC units, and must be purchased separately for other models The rectifier (which also contains an integral 12-3 Vac transformer) provides an output of 3 Vdc to supply the powered sensors, and boost facilities, when connected to 12 Vac supply Certain fans have an integral 230-12 Vac transformer, while other models do not Aereco can supply a stand alone 230-12 Vac transformer where required 8 Don’t Introduce more bends than necessary Allow ducts to be unsupported Attempt to fabricate components not suitable for the transfer of air Use flexible duct for the entire installation Rush the connections Cram flexible duct into small areas where it can be crushed Use flexible connections as bends Snake ducts unnecessarily Ducting must be competently installed to ensure minimum air resistance and leakage within systems For guidance on air tightness please refer to HVCA DW/143 document ‘A Practical Guide to Ductwork Leakage Testing’ In order to minimise pressure loss, rigid duct should be used throughout with only small lengths of flexible duct used for final connections, negotiating obstacles or introducing irregular angles in the duct run Duct installation must follow the plan as specified by the designer, (although there may be previously unanticipated obstacles) Where the direction of the duct run changes at a 90° angle, rigid components must be used It is also appropriate to use rigid components for shallower bends (eg 45° bends), however as not all angles can be achieved with the use of standardised rigid components, the use of correctly fitted flexible ducting is acceptable in such circumstances Rigid ducting should be correctly supported using either purpose made clips or metal banding Workable duct lengths should be connected together at floor level before being supported Particularly around obstructions This ensures that the duct can be suitably sealed Flexible ducts should be similarly supported, although extra care must be taken when using banding, as it can crush the duct and cause restrictions to airflow Purpose made clips are therefore recommended Lengths of rigid ducting should be connected using duct / straight pipe connectors or components, and sealed appropriately to ensure there is no leakage Ducts should be sealed using tape, jubilee / speed clamps or sealant Where sealant is used, a non hardening variant should be mounted as there may be some slight movement in the system Ducting installation Ducting installation 9 Ducting installation All ducts must be sealed against leakage, and special care taken for duct lengths which pass through inaccessible areas, such as ceiling voids and partition walls It is also advisable that a silicone sealant is used rather than duct tape, as this ensures longevity As previously stated, the use of flexible ducting should be kept to a minimum in order to maximise airflow Where flexible duct is used it should be pulled taut to approximately 90 % of its maximum length If this is too taut it puts strain on fixings and can adversely affect duct bends, and if it is not taut enough it can cause airflow resistance through sagging The tension applied should seek to strike a balance between these two extremes The sealing of connections to flexible ducting should be via the use jubilee / speed clamps and neither sealant nor tape alone, as these do not provide sufficient restraint when the ducting is pulled taut Insulated duct, (flexible or sleeves) should be used where required for the prevention of condensation on or within ductwork This insulation must achieve a thermal conductivity of 004 W/mK, which is characteristically equivalent to 25mm of fibre-glass insulation Insulation of ductwork in Aereco DCMEV systems is required for ductwork which passes through areas which are outside the insulation barrier of the dwelling Insulated duct comes in two formats, standard and acoustic (where the internal bore is perforated) The acoustic variant should not be used outside the insulation barrier of the dwelling, as condensation can pass into the fibre-glass material, and reduce its effectiveness Where insulated duct has been installed vertically, it may also be necessary to install condensation traps Fire safety is not covered in this document; however a fire strategy should be applied with reference to the latest standards and regulations Do Ensure ducts take path of least resistance Use rigid duct throughout where possible Avoid unnecessary bends Ensure ducts are fixed to the surface securely and sealed appropriately Mechanically fix and tape joints to ensure an airtight seal 10 Handover Upon handing over the system to the client, the installer must provide suitable instruction for maintenance and operation Operating and maintenance instructions are provided within the packaging of Aereco fans and grille terminals These can also be downloaded from wwwaerecocouk Instruction must not only be provided in a literary form, but also in the form of demonstration and advice where appropriate It is recommended that the occupier / client is informed of need keep cross ventilation passages free from obstructions, and settings which should not be adjusted, in order to maintain the correct balance of ventilation Checklist Before handing over to the client, it is advisable that the system is checked and tested to ensure correct operation Ductwork should be visually inspected to ensure joints and fixings are tight and sealed in an appropriate manner to certify that the system has no defects which are hazardous, or will affect performance All grille terminals should be inspected to ensure shutters can move freely and that boost functions and sensors (where applicable) are working correctly The Hygro should be visually checked to ensure that that the shutters open correctly when humidity levels increase Models with a boost function should be checked in the test mode (as detailed in the appropriate instruction manual supplied with each grille) The positioning and operation of the isolating switch should be checked (The fan should only be able to be turned off by the occupier using the isolation switch) Once all other checks have been completed a visual inspection of the fan must be undertaken After isolating the power to the fan, the wiring should be checked to ensure connections are secure The fan also needs to checked to ensure that it is free of any debris which could harm the internal working of the unit After the checks have been performed and the fans lid has been re-fitted, the power can be switched on At this point the fan should be checked for any abnormal noise, whilst running at both high and low levels of extraction It is advisable to check the airflow with a manometer The BXC terminals incorporate a pressure plug which can be used to fix the Hygro to its minimum position A reading can then be taken from the pressure plug and airflow deduced by the conversion table supplied within the box Aereco can also provide assistance where required System verification and instruction Installation schematic 11 Grille termination BXC Extract fan V2A Extract fan V4A Extract fan VAM Extract fan VPH Code Code AVLBXC273 (h) AVLBXC215 (hi) AVLV2A032 AVLV4A336 AVLVAM767 AVLVPH075 AVLBXC276 (p) AVLBXC299 (pd) AVLBXC275 (hpd) AVLBXC401 (CO 2 ) Characteristics AVLBXC402 (VOC) AVLBXC404 (RC) Max airflow: 80m3/hr Max airflow: 210m3/hr Max airflow: 250m3/hr Max airflow: 300m3/hr AVLBXC406 (hRC) AVLBFX371 (F) Max pressure: 80 Pa Max pressure: 118 Pa Max pressure: 120 Pa Max pressure: 130 Pa Dim: 390x390x176mm Dim: 450x450x219mm Dim: 480x480x240mm Dim: 340x335x345mm Airflow characteristics Humidity controlled Installation Airflow 100 Pa: Max available spigots: 4 Max available spigots: 4 Max available spigots: 7 Max available spigots: 6 12-70m3/hr: min position Airflow capacity: 2 extracts* Airflow capacity: 4 extracts* Airflow capacity: 6 extracts* Airflow capacity: 6 extracts* 42-120m3/hr: max position Installation in inhabitable space (cupboard, ceiling, etc) Installation in inhabitable space (cupboard, ceiling, etc) Installation in inhabitable space (cupboard, ceiling, etc) Controls Installation in protected non- inhabitable place (attic, etc) Installation in protected non- inhabitable place (attic, etc) Installation in protected non- inhabitable place (attic, etc) Installation in protected non- inhabitable place (attic, etc)h: humidity control i: impulse (switch) Installation in wall on ceiling Installation in wall on ceiling Installation in wall on ceiling Installation in wall on ceiling p: pressence (PIR) Installation on floor Installation on floor Installation on floor d: boost delay RC: remote control Spigots: in the box CO 2 : CO 2 control Inlet: 80mm dia x 2 Inlet: n/a Inlet: n/a Inlet: 80mm dia x 4 125mm dia x 2VOC: VOC control F: manually settable Outlet: 100mm dia x1 Outlet: 125mm dia x1 Outlet: 125mm dia x1 Outlet: 100mm dia x1 Duct compatibility Accessories 125mm dia (up to code 299) Inlet: 80-125mm dia Code: AVLAEA877 Inlet: 125mm dia spigot Code: AVLAEA055 Inlet: 125mm dia Code: AVLAEA808100mm dia (from code 400)** Bracket** Outlet: 100-125mm dia Spigots available as accessories Code: AVLCR125100 Installation schematic * maximum airflow capacity depends on calculated pressure drop, figures shown are a estimated average ** please contact Aereco for alternative model codes UK Office 2B, 4020 Middlemarch Siskin Parkway East Middlemarch Business Park Coventry – CV3 4SU tel: 024 7630 7736 – fax: 024 7663 9763 infoaerecocouk | wwwaerecocouk FLY 51 0G B_ U K
Recommended

![Anima Beyond Fantasy - Arcana Exxet [English Edition]](imgdoc/11466.jpg)